
Sweet Ant Tools 1.0
SAT is a set of tools for Ant under Apache license. You will find console mode (that runs Ant in a console that lets you type commands to run builds for instance) that boosts build times. You’ll find also tasks to launch Beanshell scripts from within Ant ones, to perform XSLT formatting using XT and to manage XML documents (merge, split or include them in other files). An Ant mode for Emacs is also included. This package is used to generate my web site and Éditions O’Reilly’s web site.

Install SAT
Zip Archive sat-0.9.zip
You must first install a Java Virtual Machine version 1.2 or 1.3. You can download one for free on Sun web site. The latest version of SAT is available on my personal web page.
To install SAT, unzip the archive in a directory where you want to install it. Then copy files in the lib directory into the lib directory of Ant.
Compile SAT
To compile SAT, you must install Ant version 1.3 or 1.4. You can download it on Apache web site. You must also install jar files of Ant (ant.jar) and a JAXP XML parser (for instance the one you can download on Sun’s web site) in the lib directory of SAT.
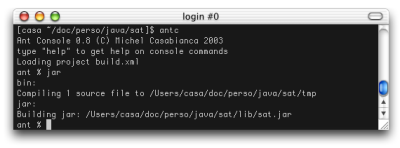
To generate the SAT jar file, type ant jar in the prj
directory. Then put the generated jar file (sat.jar in the lib
directory) in the lib directory of Ant. You will then be able to
generate the documentation and zip archive by typing ant on the
command line (SAT uses itself to generate it’s documentation and the zip
archive).
Ant Console
This tool runs Ant in a console (in a terminal or within your favorite IDE) and lets you type commands to run targets of the loaded build file. This method runs much faster than Ant because it saves time to launch the Java Virtual Machine, JIT compilation time and build file loading. You can run builds up to 5 times faster than running Ant on the command line. It is obvious than you save more time on small builds (when time spent in usefull code is small compared to startup time).
Installation
Go in the bin directory of your Ant installation, copy the ant
script (or ant.bat for OS disabled people) to file antc (or
antc.bat). Replace org.apache.tools.ant.Main with
net.cafebabe.sat.ant.Console. This script will launch the Ant console
instead of traditional Ant. Make sure that this script is in your
PATH.
You must, of course, install SAT by dropping the file sat.jar in the lib directory of your Ant installation.
Usage
To run the Ant console, go in the directory of your project (where is
living your build.xml file) ant type antc. You will display an help
screen typing antc -help on the command line :
Ant Console 0.8 (C) Michel Casabianca 2003
type "help" to get help on console commands
Usage: antc [-help] [-version] [-timer] [-file file] [-find file]
-help    Print this help screen
-version Print the version
-timer   Print build times
-file    To set the build file
-find    To search for the build file
When you launch the Ant console, you will be promped as following :
To display an help screen about the console commands, type help in the
console :
Commands you can run in the console are the following:
  help          To display this help screen
  exit          To quit the console
  desc          To describe the loaded project
  load file     To load the build file
  find file     To find the project file
  reload        To reload the current project
  timer on/off  To set timer on/off
  target foo    To run the target foo
  targetname    To run the target (can't be a console command)
  <empty>       To repeat the last command
Note that you can launch a given target by typing its name (this is a
shortcut for the target command) provided that this target hasn’t the
same name than a console command. You can repeat the last command by
typing ENTER.
You can load a build file using the load command (the path is then
relative to the current directory) and search for a build file
recursively in the file system with the find command (that behaves
like the -find command line argument for Ant). You can also reload the
current project with reload. This may be necessary when the build file
changes on disk or when the project is corrupted (which happens
sometimes after a build error because some tasks don’t work after an
error).
The desc command describes the current project (behaves like the
-projecthelp command line parameter for Ant).
I have also implemented a timer (to display execution time for builds)
that you can switch on or off using the timer command. The result
is in milliseconds (because the builds are so fast :o)
Notes
Builds in the console are faster because you save startup times, thus performance gains are more important for small builds. For instance, for an empty build (that doesn’t do anything), the build in the console takes about 30 ms and 5 seconds in Ant (more than 100 times slower). Nevertheless, performance boost should not be neglected for real world project. For instance, rebuilding the whole SAT project takes about 12 seconds in the console and 25 seconds running Ant (more than 2 times slower).
Furthermore, this console supercedes my server task which is far more
complex to use and I don’t integrate it from the 0.9 release (you can
still download it in version 0.7.
The console was developped and tested using the latest stable Ant release, that is version 1.5.3-1. Le me know if you have tested with other versions.
Tasks description
SAT is a set of optional tasks for Ant, thus for each task there is a taskdef element (to tell Ant which class is associated to a given task) and an XML element.
File, dir et fileset
All those tasks select files using file and dir attributes and the fileset element. These attributes and element use the following syntax:
- file: This is an attribute that contains a list (coma separated) of files to process.For instance, file=“foo” selects the file foo while file=“foo,bar” selects the files foo and bar.
- dir: This is an attribute containing a (coma separated) list of
directories to process. This selects all files in a directory but
not those in a subdirectory. For instance,
dir="foo"selects all files in the foo directory, but none in a foo/bar subdirectory.dir="foo,bar"selects all files in directories foo and bar. - fileset: This is a nested element to select files. See Ant documentation for more details about this element.
Files or directories with relative path are relative to the Ant script.
Thus, the attribute file="foo" in the script /home/casa/build.xml
selects the file /home/casa/foo.
It is possible to mix the file and dir attributes and fileset elements to select files. For instance:
<foo file="file" dir="dir">
  <fileset dir="dir2" includes="*.xml"/>
</foo>
Selects the file file, files in the directory dir and XML files in the dir2 directory.
Bsh
Description
This task launch a Beanshell script. This script may be nested in the element or written in a file. It is also possible to give arguments to the script with the args attribute or a nested script.
The declarative element (after the <project> one) is the following:
<taskdef name="bsh" classname="net.cafebabe.sat.bsh.BshTask"/>
This task was successfully tested with Beanshell version 1.1a18 (which
jar file is included in this package). It doesn’t work with version
1.1a12 or older (the interface bsh.ConsoleInterface was different for
those versions) and with version 1.2b1 (due to a bug).
Parameters
| Attribute | Description | Required |
|---|---|---|
| file | Beanshell script(s) to execute | No |
| dir | Directory(ies) with Beanshell scripts to execute | No |
| args | Argument list (coma separated) to pass the the Beanshell script. You can access this argument array using this.interpreter.get("bsh.args"); |
No |
| reset | Indicates if the Beanshell interpreter should be reset before to launch the script. Can take the true or false values. | No (defaults to true) |
Nested elements
You may select scripts to launch using <fileset> nested elements. See Ant documentation for more details about this element.
Nested text
A script may be nested within a <bsh> element.
Ant properties
A Beanshell script can access Ant properties using setAntProperty()
and getAntProperty() commands. See below for a short sample script.
Beanshell Commands
This package also provides Beanshell commands to access Ant properties
(defined using property elements) from within a Beanshell script.
Those commands have the following signature:
void setAntProperty(String name,String value): defines a property called name with a value value. This property doesn’t have to be defined in apropertyelement.String getAntProperty(String name): returns the value of the Ant property called name.
Another command resolves a file name according to the directory where the Ant script is running. In an Ant script, a file name is relative to the directory of the script (instead of the current directory). The signature of this method is the following:
File resolveAntFile(String file): return the file resolved according to the directory where the script is running.
This task defines a variable called antProject in the Beanshell interpreter. This variable contains a reference to the running Ant project.
Examples
To launch a script bsh.bsh in the test directory, you may write:
<bsh file="test/bsh.bsh"/>
You can also write the script in the <bsh> element:
<bsh>
  print("Hello World !");
</bsh>
Note that a script nested in a bsh element is parsed when the Ant script is executed. Thus it should not contain < nor & characters or it must be nested in a in a CDATA declaration as following:
<bsh>
  <![CDATA[
  print("<date>"+new Date()+"</date>");
  ]]>
</bsh>
To pass a foo argument to the script (as if it was was passed on the command line), you may use an args attribute:
<bsh file="test/bsh.bsh" args="foo"/>
Now a more complex sample:
<bsh file="test/bsh.bsh" args="foo,bar">
  nested="nested";
</bsh>
Where the script test/bsh.bsh is the following:
#!/usr/local/bin/bsh
// display arguments on the command line
args=this.interpreter.get("bsh.args");;
if(args!=null) {
    for(int i=0;i<args.length;i++)
        print("Argument "+i+": "+args[i]);
}
// display argument in nested script
print("Argument nested: "+nested);
Will produce the following output:
bsh:
    [bsh] Arguments: foo bar
    [bsh] Executing nested script...
    [bsh] Executing script 'test/bsh.bsh'...
    [bsh] Argument 0: foo
    [bsh] Argument 1: bar
    [bsh] Argument nested: nested
This trace shows the evaluation order of the beanshell code:
- The arguments are declared first.
- Then the nested script (if any) is executed.
- Then the selected script(s) are executed.
The following script displays the value of foo property and give a value to the bar property.
print(getAntProperty("foo");
setProperty("bar","Hello World!");
XTask
Description
This task uses the XT XSLT processor from James Clark to transform an XML document. This processor is, according to many benchmarks, the fastest Java processor (but the author doesn’t develop it anymore).
The task declaration (after the <project> element) is the following:
<taskdef name="xtask" classname="net.cafebabe.sat.xml.XTask"/>
Parameters
| Attribute | Description | Required |
|---|---|---|
| file | File(s) to transform. | No |
| dir | Directory(ies) of the files to transform. | No |
| style | The stylesheet to use for transformation. | Yes |
| tofile | The generated file (if there is only one). | No |
| todir | Directory(ies) of the generated files. | No |
| extension | The file extension of the generated files. | No (defaults to .html) |
| force | Force the transformation even if the generated file already exists and is newer than the XML file and the stylesheet. May take true or false values. | No (defaults to false) |
Nested elements
You may select files to transform with a nested <fileset> element. See Ant documentation for more details about this element.
It is also possible to pass arguments to the XSLT processor using <arg> elements. For instance, to assign the value bar to the parameter foo, you should nest within the <xtask> element:
<arg name="foo" value="bar"/>
This element may not contain text.
Examples
To transform a file foo.xml to bar.html using the transfo.xsl stylesheet, you may write:
<xtask file="foo.xml"
       style="transfo.xsl"
       tofile="bar.html"/>
To assign the value bar to the parameter named foo, you will write the element:
<xtask file="foo.xml"
       style="transfo.xsl"
       tofile="bar.html">
  <arg name="foo" value="bar"/>
</xtask>
Note
This task was previously distributed alone on my page (version 0.1). It is now part of the SAT package.
Valid
Description
This task validates XML files. You may validate a file against its DTD or simply check the XML syntax (check that the document is well formed). You can choose to stop Ant compilation while an error is encountered, the error level or the maximum number of parsing errors to display for each file.
The declarative element (after the <project> one) is the following:
<taskdef name="valid" classname="net.cafebabe.sat.xml.ValidTask"/>
Parameters
| Attribute | Description | Required |
|---|---|---|
| file | File(s) to validate. | No |
| dir | Directory(ies) of the files to validate. | No |
| dtd | Tells the parser if the file(s) to parse have a DTD (stated in the DOCTYPE) or if it should only check the XML syntax (if the value of this attribute is false). | No (defaults to true) |
| failonerror | Tells the parser to stop Ant buildfile processing when it encounters an error (if the value of this attribute is true). | No (defaults to true) |
| errorlevel | The error level to check (errors of that level or higher are displayed and may interrupt Ant processing). Possible values are warning, error and fatal. | No (defaults to fatal) |
| maxerrors | This is the maximum number of errors to display for an XML file. This number must be greater than 0. | No (defaults to 100) |
Nested elements
The files to merge can be selected using a <fileset> element. See Ant documentation for more details about this element.
This element may not contain text.
Examples
To validate all XML files of the a directory, copy the following buildfile in that directory:
<?xml version="1.0" encoding="iso-8859-1"?>

<project name="xml" default="valid" basedir=".">

 <taskdef name="valid" classname="net.cafebabe.sat.xml.ValidTask"/>

 <target name="valid">
  <valid dtd="true"
         failonerror="true"
         errorlevel="fatal"
         maxerrors="100">
   <fileset dir="." includes="*.xml"/>
  </valid>
 </target>

</project>
Then launch Ant typing ant on the command line. Note that attributes
have their default values. Adapt this file to meet your needs.
If you want to validate all Ant buildfile on your disk, launch in the root directory the following file:
<?xml version="1.0" encoding="iso-8859-1"?>

<project name="xml" default="valid" basedir=".">

 <taskdef name="valid" classname="net.cafebabe.sat.xml.ValidTask"/>

 <target name="valid">
  <valid dtd="false"
         failonerror="false"
         errorlevel="warning"
         maxerrors="1">
   <fileset dir="." includes="**/build.xml"/>
  </valid>
 </target>

</project>
The dtd attribute is false because buildfile do not have a DTD, you
ask the parser not to stop when it encounters an error to scan the whole
disk, you put the error level on the lowest value to detect any problem
and you ask to display only one error per file in order to avoid too
many error messages.
Merge
Description
This element is for merging XML files into one. This file contains the root elements within a nesting one.
The task declaration (after the <project> element) is the following:
<taskdef name="merge" classname="net.cafebabe.sat.xml.MergeTask"/>
For instance, this element may merge the following XML files:
<?xml version="1.0"?>
<root>
  <element1/>
  <element2/>
  <element3/>
</root>
and:
<?xml version="1.0"?>
<root>
  <element4/>
  <element5/>
</root>
In a single file like this one:
<?xml version="1.0"?>
<index>
  <root>
    <element1/>
    <element2/>
    <element3/>
  </root>
  <root>
    <element4/>
    <element5/>
  </root>
</index>
This element is useful to generate composite documents. For instance, the index page of my site is generated using this task. A presentation text, news and links (that are small distinct files) are merged in a single XML file. This file is transformed into an HTML page using XSLT.
Parameters
| Attribute | Description | Required |
|---|---|---|
| file | File(s) to merge. | No |
| dir | Directory(ies) of the files to merge. | No |
| tofile | File name of the resulting file. | Yes |
| encoding | This is the encoding of the resulting file. For instance, the encoding for western European languages is iso-8859-1. This gives the following XML declaration element: <?xml version="1.0" encoding="iso-8859-1"?>. |
No (defaults to ASCII encoding) |
| doctype | This is the second part of the doctype declaration. For instance, a doctype such as article PUBLIC “-//CASA//DTD article//FR” “article.dtd” would result in the doctype <!DOCTYPE article PUBLIC "-//CASA//DTD article//FR" "article.dtd">. The root element of the document is extracted from this doctype. If no doctype is provided, the root element is <index>. |
No (defaults to no doctype) |
Nested elements
The files to merge can be selected using a <fileset> element. See Ant documentation for more details about this element.
This element may not contain text.
Examples
To merge XML files in the index directory using ISO 8859-1 encoding into a file called index.xml with no doctype (and a root element index), you may write:
<merge dir="index"
       tofile="index.xml"
       encoding="iso-8859-1"
       doctype="index PUBLIC '-//CASA//DTD index//FR' 'index.dtd'"/>
To merge the XML files in the xml directory and subdirectories, in a single index.xml file, you may write:
<merge tofile="index.xml"
       encoding="iso-8859-1"
       doctype="index PUBLIC '-//CASA//DTD index//FR' 'index.dtd'">
  <fileset dir="xml" includes="**/*.xml"/>
</merge>
Insert
Description
This task is for replacing a processing instruction with the content of a given file. You can thus include an HTML file fragment in an HTML file. This is the way menus are included in the web pages of my site.
The task declaration (after the <project> element) is the following:
<taskdef name="insert" classname="net.cafebabe.sat.xml.InsertTask"/>
Parameters
| Attribute | Description | Required |
|---|---|---|
| file | File(s) to process. | No |
| dir | Directory(ies) of the files to process. | No |
| pattern | This is the name of the processing instruction to replace. For instance, if the pattern is foo, the processing instructions to replace are <?foo ?>. |
No (defaults to insert) |
| source | File to insert to replace processing instructions. | Yes |
Nested elements
You can select the files to process using a <fileset> element. See Ant documentation for more details about this element.
This element may not contain text.
Examples
To replace <?menu ?> processing instructions of files in the html directory with the content of the menu.html file, you may write the following element:
<insert dir="html"
        pattern="menu"
        source="menu.html"/>
Nest
Description
Using this task, you can nest files within a given one, replacing a given processing instruction. You may this way nest HTML fragments in a page template.
The task declaration (after the <project> element) is the following:
<taskdef name="nest" classname="net.cafebabe.sat.xml.NestTask"/>
Parameters
| Attribute | Description | Required |
|---|---|---|
| file | File(s) to process. | No |
| dir | Directory for files to process | No |
| pattern | The name of the processing instruction to replace. For instance, if this pattern value is foo, the replaced processing instructions are <?foo ?>. |
No (defaults to nest) |
| source | The file to nest around selected files. | Oui |
Nested elements
You can select the files to process using a <fileset> element. See Ant documentation for more details about this element.
This element may not contain text.
Exemples
To nest files in the html directory within the file page.html,
replacing the <?body ? processing instruction, you may write the
following element:
<nest source="page.html"
      pattern="body"
      dir="html"/>
Split
Description
This task splits files using processing instructions. The name of the generated files is written in the processing instruction.
The task declaration (after the <project> element) is the following:
<taskdef name="split" classname="net.cafebabe.sat.xml.SplitTask"/>
For instance, the following file:
<?xml version="1.0"?>
<?split file="page1.html"?>
<html>
...
</html>
<?split file="page1.html"?>
<?split file="page2.html"?>
<html>
...
</html>
<?split file="page2.html"?>
Will be split in two files (page1.html and page2.html):
<html>
...
</html>
Most of XSLT processors (such as XT or Xalan) implement extensions to produce more than one file but this task allows you to avoid to pollute your XSLT code with proprietary one.
Parameters
| Attribute | Description | Required |
|---|---|---|
| file | File(s) to process. | No |
| dir | Directory(ies) of the files to process. | No |
| pattern | This is the name of the processing instruction used to split the files. For instance, if this pattern is split, the processing instructions where to cut files look like <?split file="foo"?>. |
No (defaults to split) |
Nested elements
You can choose the files to process with a nested <fileset> element. See Ant documentation for more details about this element.
This element may not contain text.
Examples
To split a file called foo using processing instructions that look
like <?cut file="bar"?>, you would write:
<split file="foo"
       pattern="cut"/>
XML Word Count
Description
This task counts words in an XML document. Useful when you write an XML file with word count constraints (for an article for instance). The text in any element of the document is taken into account while the text in attributes is ignored. This default behavior may be changed using the task parameters.
The task declaration (after the <project> element) is the following:
<taskdef name="xwc" classname="net.cafebabe.sat.xml.WordCountTask"/>
Parameters
| Attribute | Description | Required |
|---|---|---|
| separators | The list of separator characters (characters between words). | No (defaults to a reasonable list of separators). |
| excludeElements | A coma separated list of elements to exclude from the word count. | No (defaults to no elements). |
| singleElements | A coma separated list of elements that count as a single word. | No (defaults to no elements). |
| includeAttributes | A coma separated list of attributes to include in the word count. Those attributes are written as element@attribute, thus an attribute is associated to an element. | No (defaults to no attributes). |
| documentProperties | A file that contains the properties of the document (that is a list of elements to exclude, single elements and attributes to include). This is a properties file containing the properties separators, excludeElements, singleElements and includeAttributes. Each of these property may be empty. |
No (no properties are loaded when empty). |
| property | The Ant property where the word count is put. | Yes |
| propertyFiles | The Ant property where to put the file count. | No (defaults to no property). |
| quiet | If set to yes, the task doesn’t display any word and file count. | No (default to no). |
Nested elements
You can choose the files to process with a nested <fileset> element. See Ant documentation for more details about this element.
This element may not contain text.
Examples
Let’s say you want to count words in the XML files of the current
directory except build.xml and want to exclude the source element of
the word count. You may write the following target:
<target name="wc">
 <xwc excludeElements="source">
  <fileset dir="." includes="*.xml" excludes="build.xml"/>
 </xwc>
</target>
This will produce the following output:
$ ant wc
Buildfile: build.xml

wc:
      [xwc] 8414 words in 2 file(s).

BUILD SUCCESSFUL
Total time: 4 seconds
Now let’s suppose that we want to write the count rules in a properties file named document.properties:
excludeElements=comment,source
singleElements=file,keyb,code
includeAttributes=sect@title
This file indicates the following rules:
- We must exclude elements
commentandsourcefrom the word count. - The elements
file,keybandcodemust count as a single word. - The text in attributes
titlein thesectelements must be taken into account.
To count words in XML documents of the xml directory using those rules
and put the result in the wc Ant property, we might write:
<target name="wc">
 <xwc property="wc"
      documentProperties="document.properties">
  <fileset dir="xml" includes="*.xml"/>
 </xwc>
</target>
Link
Description
This task checks links in HTML files. It distincts two kinds of links:
local links (that point to a file in the same site and are relatives)
and external ones (that point to other sites and start with a protocol
indicator such as http: or ftp:).
The task declaration (after the <project> element) is the following:
<taskdef name="link" classname="net.cafebabe.sat.html.LinkTask"/>
Parameters
| Attribute | Description | Required |
|---|---|---|
| file | File(s) to process. | No |
| dir | Directory(ies) to process. | No |
| external | Indicates if external links should be checked. | No (defaults to false). |
| interrupt | Indicates if processing should stop with an error message if a broken link is met. | No (defaults to false). |
| log | The name of the file where to log link checks. | No |
Nested elements
You can choose the files to process with a nested <fileset> element. See Ant documentation for more details about this element.
This element may not contain text.
Examples
Let’s suppose that you want to check HTML files in the html directory and it’s subdirectories and want to stop processing if a broken link is met. You would write:
<link external="false"
      interrupt="true">
 <fileset dir="html" includes="**/*.html"/>
</link>
If a broken link is met, the compilation will stop with an error message that gives the file and link.
If you want to to check external links (which may be quite long) without stopping on error and log checks in a file named links.txt, you may write:
<link external="true"
      interrupt="false"
      log="links.txt">
 <fileset dir="html" includes="**/*.html"/>
</link>
Emacs mode
Ant is widely used to build Java projects, and thus is integrated to many Java development tools (such as JDE, an Emacs mode for Java development). Nevertheless, Ant also proves to be helpful in many other occasions, such as generate HTML documentation from XML source files. That’s what lead me to develop this standalone Ant mode for Emacs.
To install this Ant mode, copy el/ant.el file in a location where Emacs will find it and add the following lines in your .emacs configuration file:
(load "ant")
(ant-mode)
When you restart Emacs, an Ant menu appears, with the following
entries:
- Build: Launch Ant. A prompt in the minibuffer enables you to type the target to launch. If you enter no target, the default one will run. You may give more than one target, separating them with a white space.
- Rebuild: Launch Ant using the target you used in last execution.
- Build File: The default behavior is to search for the build file recursively in the directory tree. Using this menu option, you can use any build file.
- Targets: Prints the list of targets in the minibuffer.
- Help: Print an help screen on the build file (a list of targets and their description).
- Start Server: Starts Ant in server mode (see the
servertask bellow). This feature is quite experimental and buggy). - Stop Server: Stops Ant running in server mode.
The result of the build is printed in the compilation buffer and you may thus click on an error message to open the responsible file in an Emacs buffer.
It may be useful to bind keys to Ant calls. For instance, my .emacs file has the following lines:
(global-set-key [f2] 'ant-build)
(global-set-key [f3] 'ant-rebuild)
License
This software is under Apache Software License. You may find a copy of this license (and of the licenses of other software used in this program) in the LICENSE file of SAT installation directory.
History
Version 0.9 (2003-07-14)
Upadtes are the following:
- The
servertask has been removed from the project and is not supported anymore. Use the Ant Console instead, which is much simpler to use.
Version 0.8 (2003-07-13)
Updates are the following:
- All tasks have been moved in the package
net.cafebabe.sat. This is the last time, I swear :o) - I have developped a console (which is far more efficient than the server mode).
- Scripts antc, to run the console, and ants, to run the server, have been added in the bin directory.
Version 0.7 (2002-11-11)
The documentation uses my new DTD and has been updated.
New tasks:
- Server: Boosts builds.
- Nest: New XML management task.
- XML Word Count: To count words in XML documents.
Bug fix and enhancements:
- Task XTask debugged (to run in server mode).
- Encoding management enhanced in
mergetask. - Updated to Ant version 1.5.1.
Version 0.6 (2001-10-27)
The task Marge has been optimized (using StringBuffer). The task is
about 30 times faster !
Version 0.5 (2001-10-17)
New Valid task to validate XML files.
Version 0.4 (2001-09-22)
New Link task to check links in an HTML file.
Version 0.3 (2001-09-18)
Test tasks attributes. File attributes (such as file and dir) are
checked.
Bug correction (file path are now relative to the project file location instead of the current directory).
It is now possible to set and get Ant properties from within a Beanshell
script using setAntProperty() and getAntProperty() commands.
Tasks are no more executable outside Ant (this was much more simple within Ant and painful to maintain).
The code was ported to the last versions of Beanshell (version 1.1a18 works, but 1.2b1 doesn’t due to a bug).
Added unit tests (in the prj/test directory).
Version 0.2 (2001-08-20)
The JAXP API is now used in the XTask. Permits to instanciate the XML parser in a generic way (independent from the parser implementation, provided that it implements the JAXP API). This class also search correctly for files (in the directory of the build.xml file).
Version 0.1 (2001-06-06)
The tasks have been modified (after intensive usage to generate my web site) to be more efficient/user friendly. Changes are the following:
- bsh: <arg> nested elements have been removed (parameters are set in a nested script). args attribute have been implemented to pass arguments to a script (as if they had been written on the command line launching the script). source attribute have been replaced with file. Attribute dir has been implemented. <fileset> element have been implemented. The output of the scripts have been redirected in the standard way (after a [bsh] tag).
- xtask: Bug correction. All attributes have changed (they where inefficient for real usage). <fileset> have been implemented.
- merge, insert and split: file and dir implemented. No more verbose attribute (output have been tailored). <fileset> element implemented.
There should not be any syntax modification in future versions, that should only stabilize the code (attributes have to be tested to produce informative error messages).
Version 0.0 (2001-05-28)
First distributed version of SAT. The tasks Bsh, XTask, Merge, Insert and Split have been implemented.
Enjoy !